![]() Displacement mapping :
Displacement mapping :
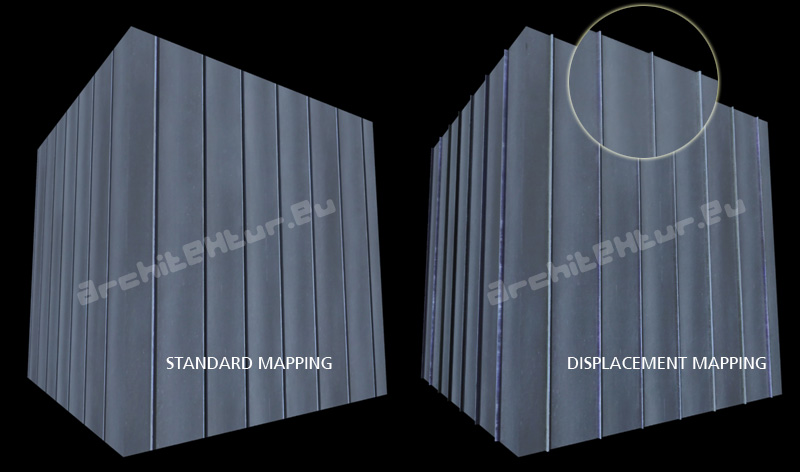
Displacement mapping, unlike Bump mapping is used to change the geometry of the object.
A displacement always works in the same way : black areas goes down, white areas goes up, extruded.
This technique can be very useful to add more realism to architectural renderings.
Displacement mapping can only be applied to Editable Mesh and NURBS objects.
For other object types, you can use the Displacement mapping only after the Disp Approx modifier has been applied.
Displacement mapping is not visible in 3d scenes unless the modifier « Displace NURBS » (for NURBS) or « Displace Mesh » (for Editable Mesh objects) have been applied.
1. Select an image map (zinc example).
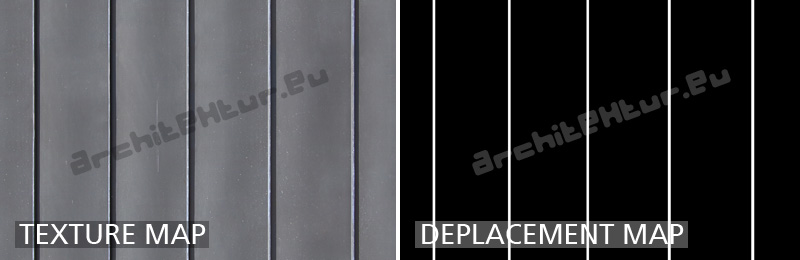
2. You need a black and white image for using as displacement. Go to the material editor and drop your N&B displacement map into an emply slot.
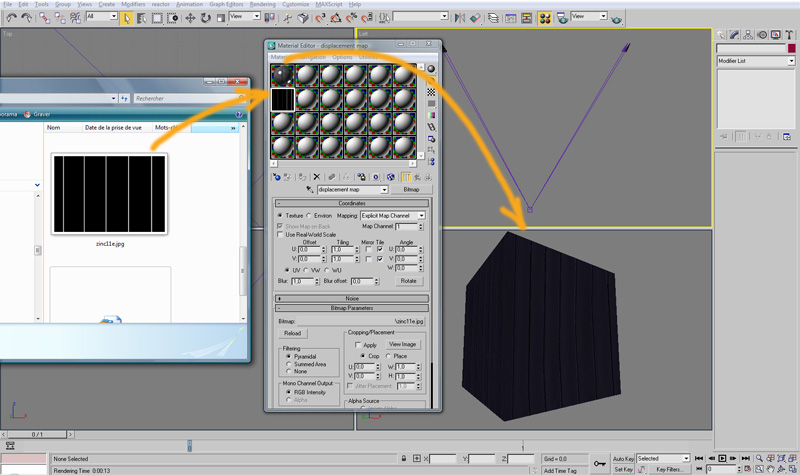
3. Select the box and add it a « VrayDisplacementMod » modifier. With the «Bitmap » created, go to the « VrayDisplacementMod » modifier and setup it as in the picture : Drop your Bitmap in « Texmap » slot, type 2D mapping, texture chan=1.
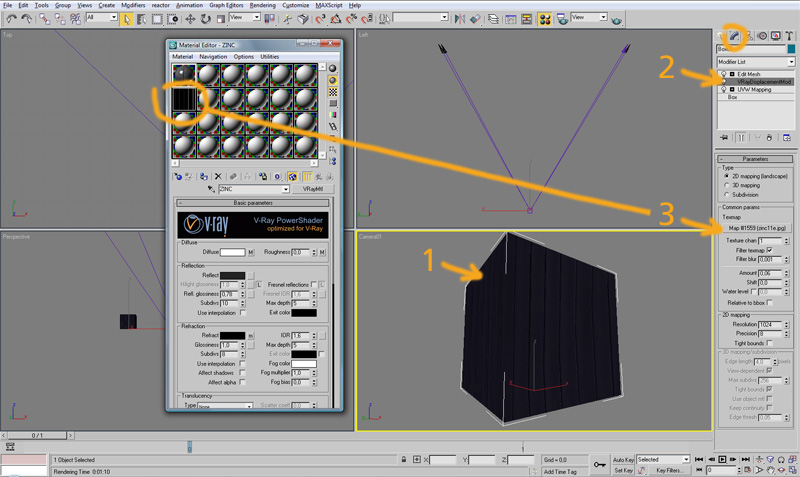
4. Try differents amounts, resolutions and precisions… Render made with Amout=6, Resolution=2048, Precision=100, Tight bounds enabled.
Tuto by JiM's